
Why Is My Sewing Machine Thread Bunching Underneath? 10 Easy Fixes
You start sewing a straight line, everything seems fine, and then you turn the fabric over and discover a tangled mess of thread underneath. Sometimes it looks like a small bird’s nest. Other times, the thread forms thick loops that pull the fabric into a knot and stop the machine from moving.
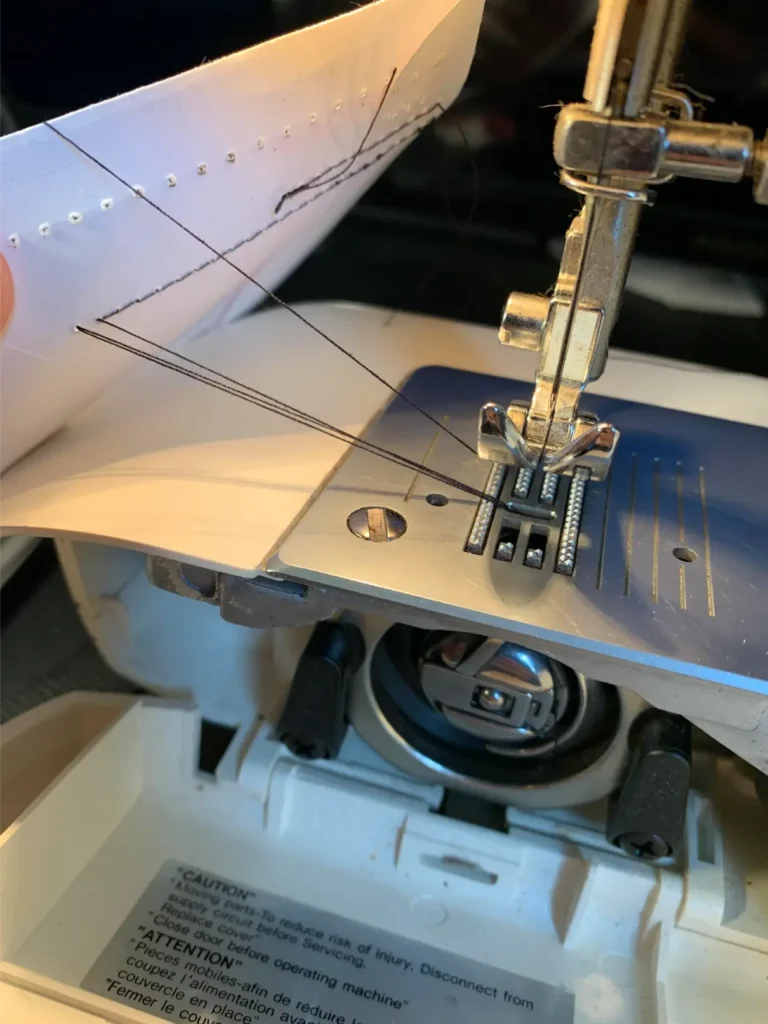
If this has happened to you, you know how frustrating it can be. You might be working on a dress, repairing a pair of trousers, or finishing a simple home sewing project. Suddenly, you have to stop, remove the fabric, and work out what went wrong.
The good news is that thread bunching underneath the fabric is often caused by a problem you can identify at home. Incorrect upper threading, a bobbin that is not seated properly, lint buildup, or a damaged needle can all affect stitch formation.
In this guide, we will explain why your sewing machine thread bunches underneath, how to check the most common causes, and what you can do to prevent the problem from happening again.
Why Is My Sewing Machine Thread Bunching Underneath?
Your sewing machine uses two threads to form a stitch. The upper thread passes through the needle, while the lower thread comes from the bobbin. As the needle moves, the machine brings the threads together and locks them into the fabric.
When everything is working correctly, the stitches look neat and balanced on both sides of the material.
When the upper thread is not correctly positioned in the threading path or tension mechanism, it may not be controlled properly during stitch formation. Loose loops can then gather underneath the fabric, even though the visible upper side looks relatively normal.
Other causes include an incorrectly inserted bobbin, a damaged needle, unsuitable thread, lint around the bobbin area, or incorrect machine settings.
Before changing several settings at once, stop sewing and inspect the machine. A careful check is usually more useful than turning the tension dial repeatedly without knowing what caused the problem.
Rethread the Upper Thread
Incorrect upper threading is one of the first things to check when thread bunches underneath the fabric.
The thread may have slipped out of a guide, missed the take-up lever, or failed to sit properly in the tension mechanism. This can happen when you change the spool, remove tangled thread, or thread the machine in a hurry.
Even if the thread appears to be in place, it is worth removing it completely and starting again.
How to fix it
- Stop the machine and switch it off.
- Raise the presser foot if your machine requires this for threading.
- Raise the needle to its highest position according to the machine’s instructions.
- Remove the upper thread completely.
- Follow the threading diagram in your manual.
- Pass the thread through every required guide and the take-up lever.
- Thread the needle in the correct direction.
- Lower the presser foot and test the machine on scrap fabric.
Pay particular attention to the take-up lever. This part moves as the machine sews and helps control the upper thread.
Helpful tip: Do not simply pull the thread out of the needle and put it back. Remove it completely and follow the entire threading path again.
If incorrect threading was the cause, the machine may start producing even stitches immediately after you rethread it correctly.
Check the Presser Foot Position During Threading
The presser foot position can affect how the upper thread sits in the tension mechanism on many sewing machines.
When the presser foot is raised, the tension discs often open to allow the thread to sit between them. Lowering the foot closes the discs and applies tension during sewing.
If you thread the machine with the presser foot down, the thread may not settle correctly between the tension discs. This can leave the upper thread too loose during stitching.
What to do
- Raise the presser foot before threading if your model requires it.
- Check that the upper thread follows the correct path.
- Make sure it passes through the take-up lever.
- Lower the presser foot before sewing.
- Test a few stitches on scrap fabric.
Not every sewing machine uses the same tension arrangement, so follow the instructions for your specific model.
If the problem continues, check the bobbin and needle before making further tension adjustments.
Check the Bobbin and Its Thread Direction
The bobbin supplies the lower thread used to form each stitch. If it is inserted incorrectly, the thread may not feed smoothly through the bobbin system.
This can contribute to tangled thread, uneven stitches, skipped stitches, or a machine that jams after a few seconds.
A bobbin can look correctly installed while still being positioned in the wrong direction.
Check these points
Bobbin direction: Some machines require the thread to unwind clockwise, while others require counterclockwise unwinding.
Thread guide: Make sure the bobbin thread passes through the correct slot or guide.
Bobbin seating: Confirm that the bobbin sits properly in its compartment or case.
Bobbin type: Use a bobbin that is compatible with your machine. Similar-looking bobbins are not always interchangeable.
Bobbin condition: Look for cracks, rough edges, or damage that could interfere with smooth thread delivery.
How to correct the problem
Switch off the machine and remove the bobbin according to the manual. Check the thread direction, inspect the bobbin, and reinstall it correctly. Guide the thread through the specified slot or tension spring, then secure the bobbin cover or case.
Do not force the bobbin case into position. If it does not fit properly, check the instructions before continuing.
After reinstalling the bobbin, test the machine at a slow speed.
Clean the Bobbin Area and Remove Lint
Sewing creates lint and tiny thread fragments. These can collect around the bobbin case, under the needle plate, and near the feed dogs.
The buildup may interfere with thread movement or fabric feeding. If loose thread is already trapped inside the mechanism, additional lint can make the problem harder to resolve.
Fabrics such as fleece, flannel, felt, and some cotton materials may leave more fibers behind than others.
How to clean the machine
- Switch off the machine and disconnect it from the power supply.
- Remove the fabric and carefully cut away tangled thread.
- Remove the bobbin and bobbin case if your manual allows it.
- Open the needle plate area if required and if you are comfortable doing so.
- Use the recommended cleaning brush to remove visible lint.
- Check for thread fragments caught around accessible parts.
- Reassemble the machine according to the manual.
Avoid using sharp objects to remove lint, as they can damage delicate components. Do not blow compressed air into the machine unless the manufacturer specifically recommends it.
Also, do not oil every part simply because the machine is making a mess. Some machines require specific maintenance procedures, while others have components that should not be oiled by the user.
Regular cleaning can prevent a small amount of lint from becoming a recurring problem.
Replace a Damaged or Incorrect Needle
A needle that is bent, blunt, damaged, or unsuitable for the fabric can interfere with stitch formation.
You may notice thread bunching underneath, skipped stitches, thread breakage, small holes in the fabric, or unusual clicking sounds.
Sometimes a needle looks fine but has become dull after repeated use. It may also have been installed incorrectly or may not be suitable for the material being sewn.
How to check the needle
Switch off the machine before inspecting or changing the needle.
Look for a bent shaft, damaged tip, or other visible signs of wear. If the needle has struck the needle plate or bobbin case, replace it rather than continuing to sew.
Choose the correct needle type and size for your fabric. For example, many knitted fabrics work well with a suitable ballpoint or stretch needle, while woven fabrics may require a universal or sharp needle, depending on the material and project.
Insert the replacement needle in the orientation specified by your machine’s manual. Push it fully into the needle clamp and tighten it as instructed.
A new, correctly installed needle is a simple troubleshooting step that can improve stitch quality and reduce other sewing problems.
Check the Upper Thread Tension
Thread tension controls how the upper and bobbin threads interact during stitch formation.
When the tension is balanced, the threads interlock within the fabric. If the tension is unsuitable, you may see loose loops, uneven stitches, or puckering.
However, a tension problem is not always solved by turning the dial. If the upper thread is incorrectly threaded, changing the setting may not address the real cause.
How to test the tension
First, rethread the upper thread and check that the bobbin is installed correctly. Inspect the needle and clean the accessible bobbin area if necessary.
Then sew a short test seam on a scrap of the same fabric.
- Loose loops underneath: Check upper threading and the tension mechanism first.
- Bobbin thread showing on top: Check upper tension, upper threading, and bobbin setup.
- Puckered fabric: Check tension, stitch length, needle choice, and fabric compatibility.
- Uneven stitches on both sides: Check the needle, thread path, and machine settings.
If the problem remains, make a small adjustment following your manual and test again. Change only one setting at a time so you can see whether the result improves.
Avoid adjusting the bobbin tension screw unless the manufacturer recommends it and you understand the correct procedure.
Use Suitable Thread for Your Project
Thread quality can affect stitch formation. Old, weak, rough, or uneven thread may break, catch in the thread path, or create excessive lint.
Thread that is too thick for the needle eye can also experience friction as it passes through the needle. Conversely, thread that is too fine for the fabric or project may not produce the desired results.
What to check
- Use thread in good condition.
- Choose a thread weight suitable for your fabric.
- Match the needle size to the thread.
- Check whether the thread spool has rough edges or damage.
- Make sure the thread unwinds freely from the spool.
- Confirm that the thread is not catching around the spool pin.
If you suspect the thread is causing the problem, try a good-quality thread suitable for your project. Rethread the machine and test it on scrap material.
Do not assume that a different brand will automatically solve the issue. The important point is compatibility between the thread, needle, fabric, and machine.
Check the Spool Pin and Thread Guides
Sometimes the thread bunches underneath because it is catching before it reaches the needle.
A spool may not rotate freely, the spool cap may be incorrectly fitted, or the thread may be wrapped around the spool pin. A rough or obstructed thread path can interrupt thread delivery and create inconsistent stitches.
How to inspect the thread path
- Stop and switch off the machine.
- Check that the spool is positioned correctly on the spool pin.
- Make sure the appropriate spool cap is fitted, if your machine uses one.
- Check that the thread unwinds smoothly.
- Inspect accessible thread guides for trapped fibers or thread fragments.
- Rethread the machine and test it again.
Some spools feed differently depending on their construction, so follow the manufacturer’s recommendations for spool orientation and accessories.
If the spool is damaged or the thread repeatedly catches, try another suitable spool and compare the results.
Adjust the Stitch Length and Sewing Speed
Your stitch settings and sewing speed can affect how fabric moves through the machine.
Very short stitches may cause lightweight material to gather, while unsuitable settings can make thick or slippery fabrics harder to handle. Sewing too quickly can also make it difficult to control the start of a seam.
Try this simple test
- Select a straight stitch suitable for your fabric.
- Set a reasonable stitch length according to the fabric and project.
- Place a scrap of fabric under the presser foot.
- Lower the presser foot before sewing.
- Hold the thread tails gently behind the presser foot if recommended for your model.
- Start slowly and allow the feed dogs to move the fabric.
Avoid pulling or pushing the material while the machine is stitching. The feed dogs are designed to move the fabric forward.
If the material does not feed properly, investigate the feeding system rather than forcing the fabric through the machine.
Clear a Thread Jam Safely
When thread bunches underneath, it can be tempting to pull the fabric away quickly. This may tighten the knot, bend the needle, damage the fabric, or leave thread trapped inside the machine.
If the fabric is stuck, do not force it.
Follow these steps
- Stop sewing immediately.
- Switch off the machine and disconnect it from power.
- Cut accessible thread tails carefully if needed.
- Raise the needle only if it can be moved safely using the handwheel and the procedure described in your manual.
- Release the fabric gently.
- Remove the bobbin and accessible tangled thread according to the instructions.
- Clean the bobbin area if necessary.
- Inspect the needle for damage.
- Rethread the machine completely before testing.
If the handwheel is jammed or will not turn with gentle pressure, stop. Do not force it, as this can worsen the problem.
A persistent jam may indicate trapped thread, a damaged component, or a mechanical issue requiring professional attention.
Why Does Thread Bunching Happen at the Start of a Seam?
If your machine forms a knot underneath as soon as you start sewing, check your starting technique.
Loose thread tails can be pulled into the bobbin area during the first few stitches. If the upper thread is also incorrectly threaded or the bobbin is not seated correctly, the tangling may happen almost immediately.
To reduce the risk:
- Check the upper threading and bobbin installation.
- Position the needle as recommended by your manual.
- Place the fabric under the presser foot and lower the foot.
- Hold the thread tails gently behind the foot if your machine’s instructions recommend it.
- Begin sewing slowly.
- Avoid pulling the fabric while the first stitches form.
If the machine continues to tangle at the start of every seam, recheck the threading path rather than assuming the problem is only your sewing technique.
Why Does My Sewing Machine Keep Bunching Thread After I Fix It?
If the problem returns after you have rethreaded the machine or replaced the needle, another cause may still be present.
For example, you may have corrected the upper threading but left lint inside the bobbin area. The bobbin could be the wrong type, or the needle may not suit the fabric. In some cases, a persistent problem points to a mechanical fault.
Use this table as a starting point.
| What you notice | What to check first |
|---|---|
| Loops underneath the fabric | Upper threading and tension mechanism |
| Tangled thread around the bobbin | Bobbin installation and trapped thread |
| Thread breaks repeatedly | Needle condition, thread quality, and thread path |
| Skipped stitches and tangling | Needle type, size, and installation |
| Fabric puckers | Tension, stitch length, and fabric compatibility |
| Fabric stuck under the presser foot | Thread jam and bobbin area |
| Handwheel will not turn | Stop and inspect safely; seek service if it remains stuck |
These are troubleshooting clues, not guaranteed diagnoses. Different machines can show similar symptoms for different reasons.
How to Prevent Sewing Machine Thread from Bunching Underneath
Once the machine is working properly again, a few simple habits can help reduce the chance of the problem returning.
Clean the machine regularly
Remove lint from the bobbin area and feed dogs according to the manufacturer’s instructions. Fabrics that shed more fibers may require more frequent cleaning.
Check threading before sewing
If you change the spool, remove tangled thread, or encounter a jam, inspect the entire threading path before starting again.
Replace needles when necessary
A blunt or damaged needle can affect stitch quality. Replace it when required and use the correct type and size for your fabric.
Choose compatible thread and fabric settings
Select suitable thread, needle, and stitch length for the material. Test the combination on scrap fabric before sewing the finished item.
Avoid forcing the fabric
Let the feed dogs move the fabric. Pulling or pushing it can interfere with stitch formation and may damage the needle.
Follow the machine’s maintenance instructions
Cleaning, lubrication, and servicing requirements vary between models. Follow the manual rather than applying oil or removing parts unnecessarily.
A Quick Test to Confirm the Problem Is Fixed
Before returning to your main sewing project, take a few minutes to test the machine.
Choose a scrap of the same fabric and thread you plan to use. Sew a short straight seam at a moderate speed, then check both sides of the fabric. The stitches should look even, with no loose loops, tangled thread, or unwanted puckering.
If the thread starts gathering underneath again, stop the machine and check the upper threading and bobbin before making further adjustments.
It can also help to keep a small note of what you changed during troubleshooting. For example, you might record that rethreading the upper thread solved the problem or that replacing a damaged needle improved the stitches. This makes it easier to recognize recurring issues and may save time in the future.
If several careful checks do not resolve the problem, consult your machine’s manual or arrange a professional inspection rather than forcing the machine to continue sewing.
When Should You Contact a Sewing Machine Technician?
Basic thread-bunching problems can often be investigated at home, but some symptoms suggest that professional servicing may be necessary.
Consider contacting a qualified technician if:
- Thread continues bunching after you have checked the upper threading, bobbin, needle, and accessible lint.
- The needle repeatedly strikes the needle plate or bobbin case.
- The handwheel is stuck or unusually difficult to turn.
- The machine makes persistent grinding or knocking noises.
- Stitches remain badly unbalanced despite correct threading and suitable settings.
- Internal components appear damaged.
- You suspect a problem with the timing or tension assembly.
Do not attempt electrical repairs or dismantle internal components unless you are qualified to do so. If your machine is still under warranty, check the warranty terms before arranging repairs.
When to Check Your Sewing Machine Manual
If your sewing machine continues to bunch thread underneath the fabric after checking the upper threading, bobbin, and needle, consult the manufacturer’s instructions for your specific model. You can find troubleshooting resources through Brother Support or visit the official SINGER website to look for manuals and support information. Always follow the instructions recommended for your machine before adjusting tension or attempting repairs.
Frequently Asked Questions
1. Why is my sewing machine making a bird’s nest underneath?
A bird’s nest is a bundle of tangled thread underneath the fabric. A common cause is incorrect upper threading, especially when the thread has missed the tension mechanism or take-up lever. An incorrectly inserted bobbin or trapped thread can also contribute. Start by rethreading the machine and checking the bobbin.
2. Is the bobbin responsible for thread bunching underneath?
It can be, but not always. The bobbin may be inserted incorrectly, the thread may not pass through its guide properly, or lint may be trapped in the bobbin area. Upper-thread misthreading is also common, so check both systems.
3. Should I increase or decrease the tension?
Do not change the tension immediately. First, rethread the upper thread, check the bobbin, inspect the needle, and clean the accessible bobbin area. If the problem continues, make small adjustments according to your machine’s manual and test after each change.
4. Can a bad needle cause thread bunching?
Yes. A bent, blunt, damaged, or incorrectly installed needle can interfere with stitch formation. Replace it with the correct type and size for your fabric and install it according to the manufacturer’s instructions.
5. Why does my sewing machine bunch thread only on thick fabric?
Thick fabric or multiple layers can make stitching more difficult when the needle, thread, or settings are unsuitable. Check the recommended needle and thread for the material, and follow your machine’s instructions for sewing thicker layers. Do not force the fabric under the presser foot.
6. Why does thread bunch underneath even with a new bobbin?
A new bobbin does not rule out other causes. The upper thread may be incorrectly threaded, the bobbin may not be seated properly, or lint may be trapped in the mechanism. Check the needle and thread path as well, and confirm that the replacement bobbin is compatible with your machine.
7. Can I keep sewing if the thread is bunching underneath?
No. It is best to stop as soon as you notice the problem. Continuing to sew can tighten the tangle, jam the machine, damage the fabric, or bend the needle. Clear the thread safely, identify the cause, and test the machine before continuing.
8. Why does my sewing machine bunch thread only when I start sewing?
Loose thread tails, incorrect upper threading, or an improperly seated bobbin can contribute to tangling at the start of a seam. Check your machine’s recommended starting procedure, lower the presser foot, and begin slowly.
9. How often should I clean the bobbin area?
It depends on how frequently you sew and the type of fabric you use. Materials that shed more lint may require more frequent cleaning. Follow the cleaning schedule in your machine’s manual.
10. When should I take my sewing machine for repair?
Seek professional help if the machine continues to bunch thread after basic checks, the handwheel will not turn, the needle strikes other components, or you hear unusual mechanical noises. Persistent problems may require inspection of the tension mechanism, timing, or other internal parts.
Final Thoughts
Finding a tangled mess of thread underneath your fabric can be frustrating, especially when you are halfway through a project. Fortunately, you can often identify the cause by checking a few basic things before considering a repair.
Start with the upper threading, because a thread that has missed its correct path can create loose loops underneath the fabric. Then check the bobbin, remove accessible lint, inspect the needle, and make sure your thread and settings suit the material.
Change one thing at a time and test on scrap fabric after each adjustment. This makes it easier to identify what actually solved the problem.
If the machine continues to tangle or appears mechanically damaged, consult the manufacturer’s instructions or contact a qualified sewing machine technician.
At Stitch Troubleshooter, our goal is to make sewing machine problems easier to understand, one practical fix at a time.